How to Print Asset # Barcodes from Destiny.
Destiny Resource Manager - Print Resource Barcodes
There are two ways to choose the resource barcodes that you would like to print. You can either enter the barcode numbers individually (best for printing less than 10 barcodes), or you can import a barcode list. For instructions on creating a .csv file of barcode numbers for import, please see the Destiny Resource Manager - Creating a .csv Barcode List document.
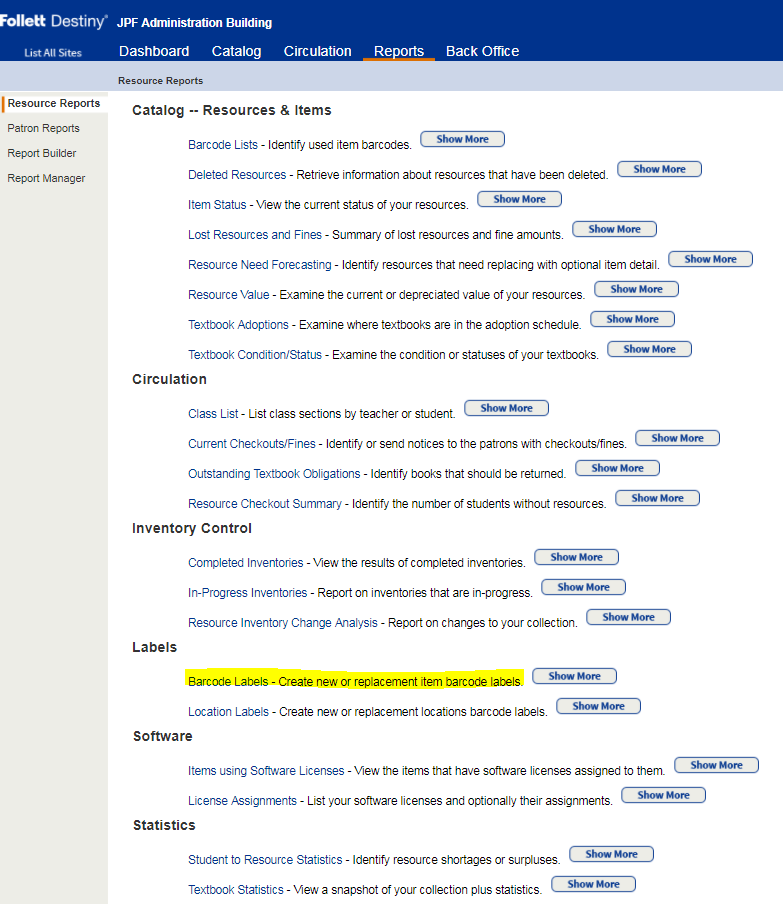
- Log into Destiny and go to Reports > Resource Reports. Near the bottom of the page, click on “Barcode Labels” in the “Labels” section.
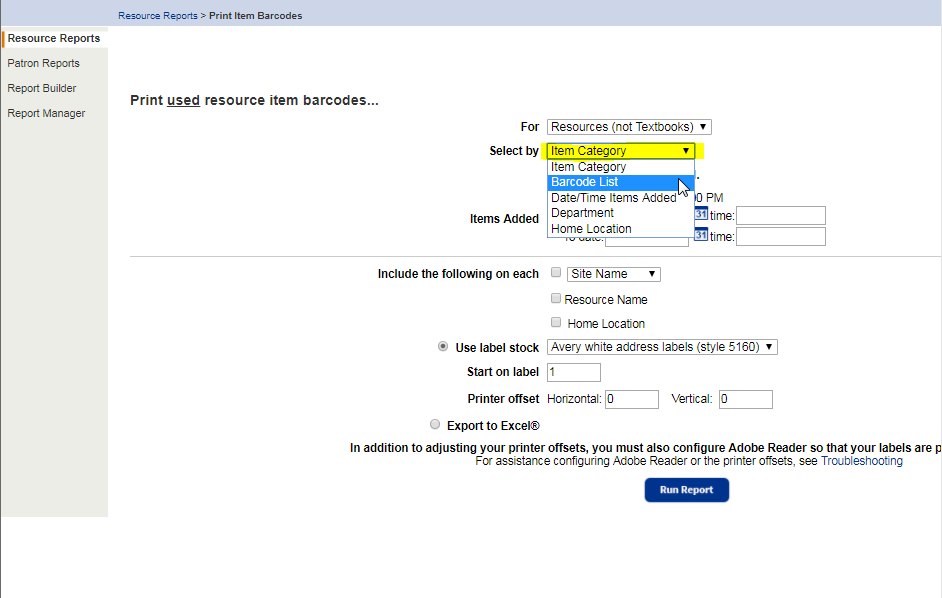
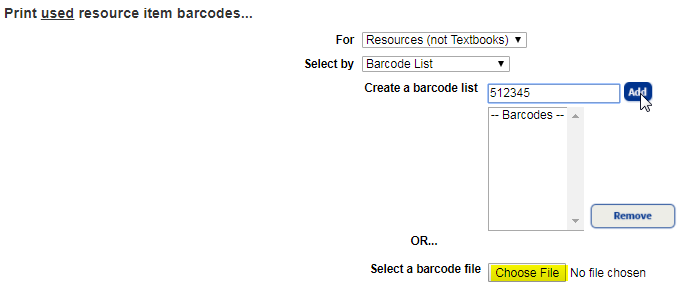
2. On the “Print Item Barcodes” page, use the “Select by” drop-down menu and choose “Barcode List.”
3. If you are manually entering barcode numbers, you can type them into the “Create a barcode list” window and click “Add.” When your list is complete, skip ahead to step #5
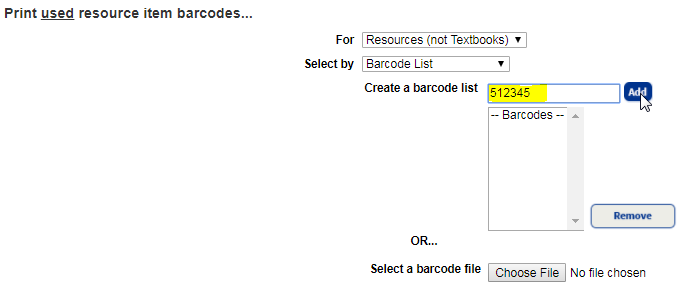
4. If you are importing a barcode list from a .csv file, click the “Choose File” button.
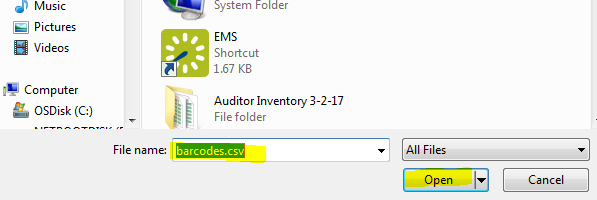
Select your .csv file by browsing to its location and click the “Open” button.
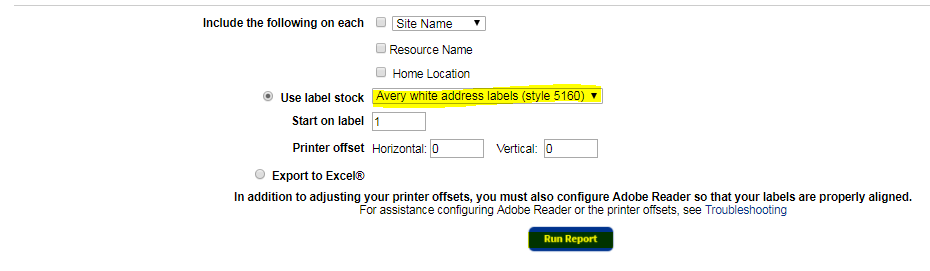
5. After completing either Step #3 or Step #4, check to make sure that the “Use label stock” type matches your labels (most likely Avery 5160) and click “Run Report.”
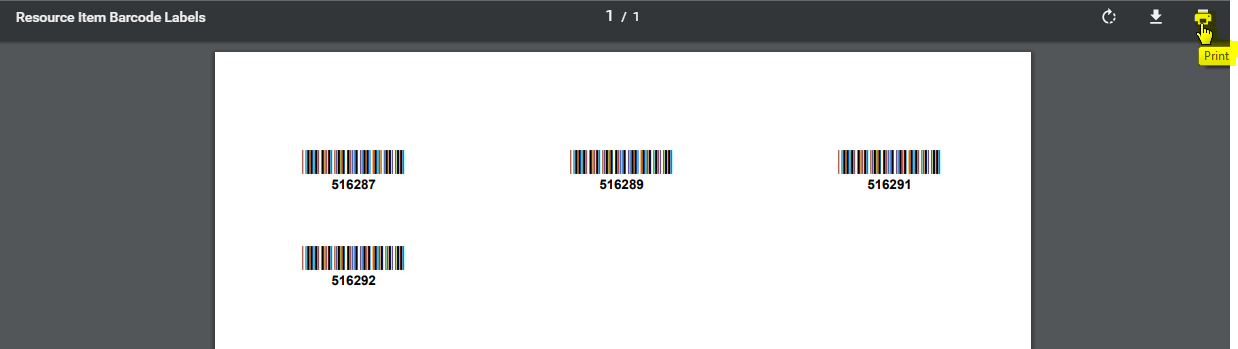
6. You will be redirected to the Report Manager page. Click on “View” to get your list of barcodes.

7. Place your label stock in the appropriate printer and then click on the printer icon to print your barcodes. Note: You can also print on regular paper and use clear box tape to put the label on.
WARNING: Please remember that you should never run a sheet of labels through your printer more than once. Labels have a high chance of coming loose and jamming your printer if you try to run them through multiple times.